Moving NSIX Email Account contents
If your NSIX account is due to be removed and you want to retain any content (emails, Google Drive documents, contacts etc) then the following information should be of help.
Please note: It may be the case that there is a school policy in place that forbids you from exporting this content and you must also be mindful of GDPR and whether you have the right to retain the information you intend to keep.
Google Takeout
Most of your Google account’s content can be exported by using Google Takeout. Google Takeout is not enabled for NSIX users by default, so you will have to request for this to be enabled if you want to use this application.
Once this has been enabled you can access the following console https://takeout.google.com/settings/takeout
Here you can select what applications/data you want to export and the format of the export file. For example, you can export all your Google Drive contents as a zip file.
However, the Google Takeout service only provides email exports in the mbox format which isn't compatible with Microsoft Outlook so you will not be able to import your Google emails into another account using Outlook.
Transfer your content to another Google account
Google Takeout also providers users with the option of transferring Gmail and Drive content directly to another Google account.
From your Google account page, select Data & Personalisation page https://myaccount.google.com/data-and-personalization and select 'Start Transfer' in the 'Transfer your content' section. This will take you to the following page: https://takeout.google.com/transfer?hl=en-GB
-
Enter a destination Google account which will receive your transferred content
-
Send Code - this will send a unique code to your other Google account.
-
Verify your destination account - enter the code which was sent to your other Google account and verify.
-
Once your other account has been verified then you can select the content to copy and transfer and begin the transfer process.
Google Mail
If you are not moving your content to another Google account then the simplest way to move your NSIX Emails to another account is to set up your NSIX Email account on Microsoft Outlook client on your desktop/laptop. Once you have done this, you can then either drag and drop emails into another account set up on Outlook or take a full .pst export which can then be imported into any other account which you have set up on Outlook.
Adding your NSIX account to Outlook
The following page provides step by step guidance on how to add a Google account to Outlook:
Add a Gmail account to Outlook
Moving emails from your NSIX account to another account
Moving selected emails:
Once you have set up your NSIX account on Outlook, it is easy to move any selected emails into another account you have set up on Outlook. Select the email or emails you want to move and simply drag them into the destination folder on the left hand mailbox display. If you want to select more than one email at a time you can hold the Ctrl key and click on multiple emails. If you want to select a particular section of emails then click on the first and then hold down the Shift key and click on the last in the list. Once you have selected the emails you want to move, you can drag them into the folder in the left hand display of your mailboxes and folders.
Creating a full mailbox export of your NSIX account:
If you want to move your full NSIX account into another email account then the best option is to create a full export .pst file which can then be imported into another account which you have set up on Outlook.
1. Select the File tab and click on Options
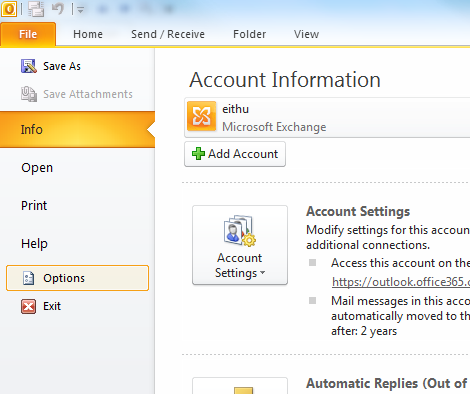
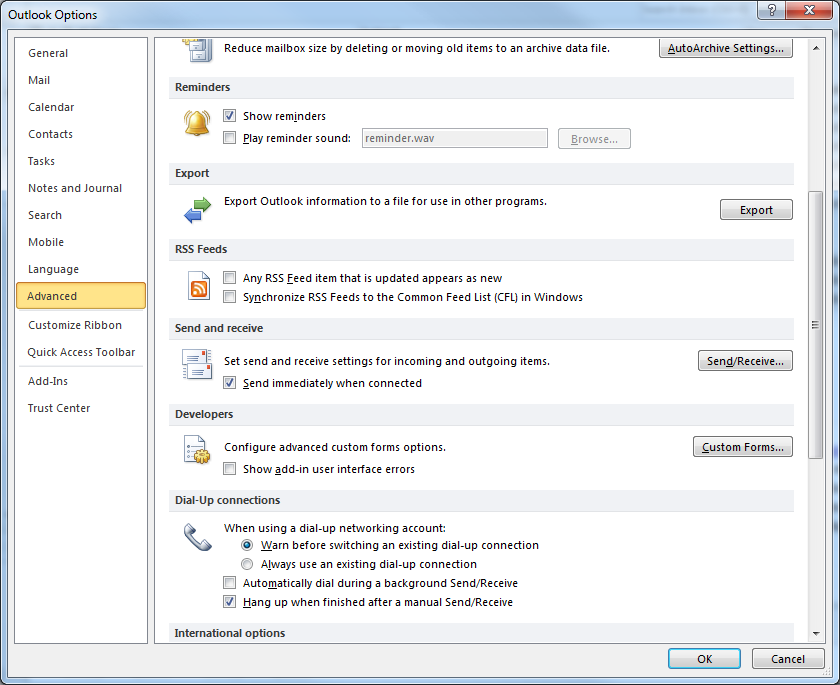
2. Click on Advanced menu option and scroll down to Export section. Click on Export
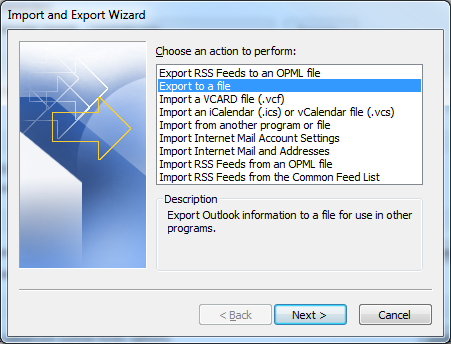
3. Select 'Export to a file' and click Next
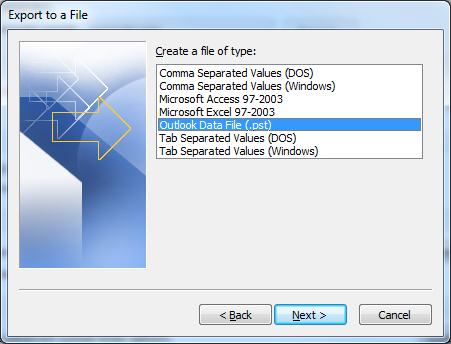
4. Select 'Outlook Data File (.pst) and click Next
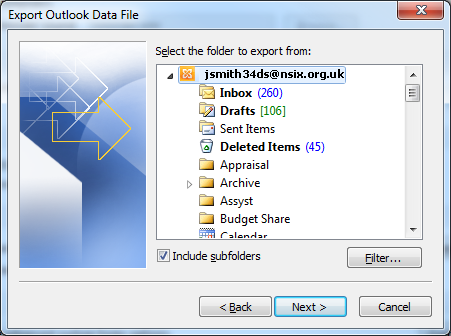
5. Select the name of the email account you want to export. Make sure that the 'include subfolders' box is ticked. Click Next.
6. Click the Browse button to choose where to save the export file and the name of the export file.
Note: If you have previously used the export feature, the previous folder location and file name will appear. Make sure that you change the file name if you want to create a new file instead of using the existing file.
If you are exporting to an existing Outlook Data File (.pst), under Options, specify what to do when exporting items that already exist in the file.
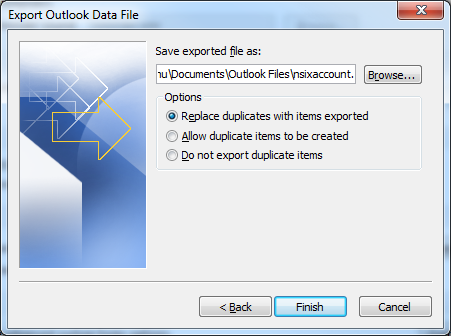
7. Click Finish.
If you are creating a new export file then you will be given the option of setting a password to protect the file.
The export will now begin.
Importing the .pst export file into another account with Outlook:
Now you have created the full export of your NSIX account, you are ready to import this mailbox into another account.
-
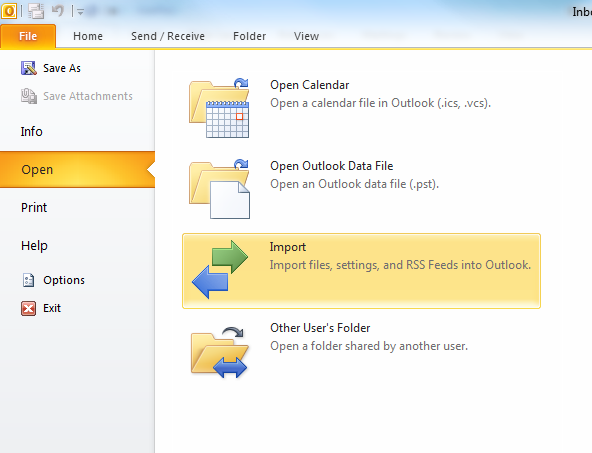
In Outlook select the File tab and then Open and Import.
-
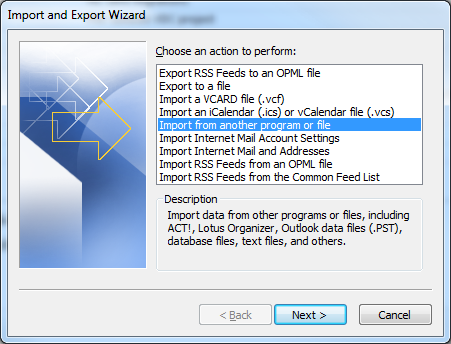
In the Import and Export Wizard select ‘Import from another program or file’ and click Next
-
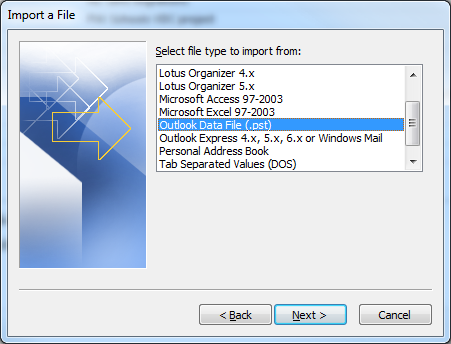
Select ‘Outlook Data File (.pst) and click Next
-
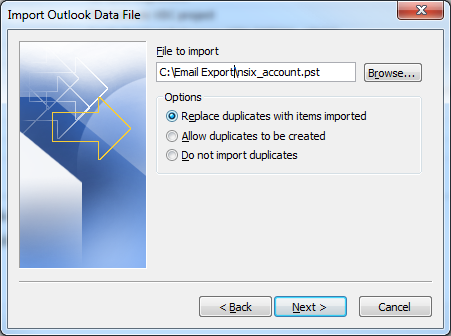
Click on Browse to locate the export pst file you want to import. Click Next.
Note: If you have imported any of the emails from the other account previously, then under options you can select what Outlook should do with duplicates.
-
If a password was assigned to the Outlook Data File (.pst), you are prompted to enter the password, and then click OK.
-
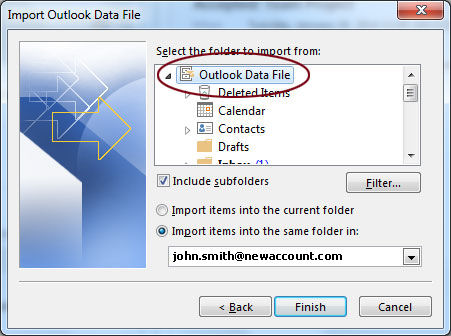
Select the folder to import from: This should be automatically selected as the top level folder for the account you exported. This is usually ‘Personal Folders’, ‘Outlook Data File’, or your email address.
-
Include subfolders is selected by default. All folders under the folder selected will be imported.
Select one of the destination options:
-
Import items into the current folder - this imports the data into the folder currently selected.
-
Import items into the same folder in - this imports the data into the destination folder of the same name as the source folder, e.g., from Inbox to Inbox. If a folder doesn’t exist in Outlook, it will be created.
-
Make sure that you have selected the account you want to import into from the drop down list.
Choose Filter if you want to only import certain emails. Choose the More Choices tab if you want to only import emails that are read or unread.
-
Click Finish and Outlook starts importing your data immediately. You will know that the import has finished when the progress box closes.