Guidance for Google NSIX email e-safety monitoring
If you are an e-safety monitor for your school’s Google NSIX emails then you will receive a copy of any emails sent or received by monitored NSIX accounts at your school that are flagged up as of potential e-safety concern. As with all monitoring tools this process can never be 100% accurate and emails will be flagged up that don’t contain any content that is of concern. However, it is important to have this monitoring in place.
If you have selected to have these emails sent to your Google NSIX account then you can set up some filtering rules that will help you monitor the e-safety emails.
How to identify e-safety emails
A copy of any emails that have been flagged up by the e-safety monitoring will be sent to your inbox and will have [ESAFETY] at the start of the subject.
Filtering e-safety emails in your Google mail account:
You may find it easier to apply a filter for e-safety emails to add a coloured label to make the emails even easier to identify in your inbox. Once a label is set up on Google mail you will also see this on the left hand mail menu and you can click on the label to display only those emails. Labels can be thought of like email folders in Outlook but the advantage of using labels is that more than one label can be applied to an email (with Outlook folders an email can only be put in one folder).
You can also set up this filter so that these emails do not appear in your inbox and only appear under the label menu option.
To do this:
-
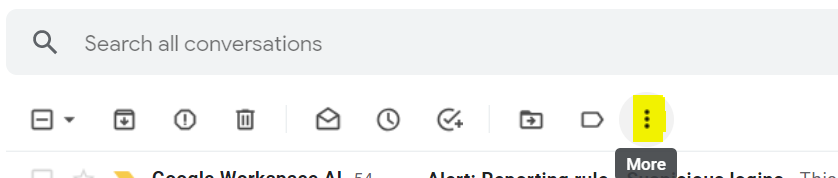
Select any email starting with [ESAFETY] in the subject by clicking in the box next to it, then on the top menu click on the
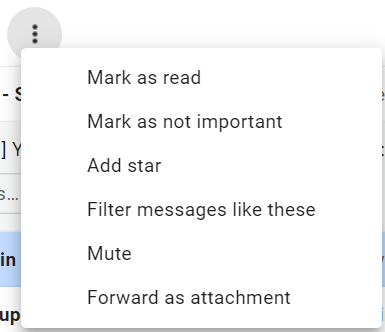
 More option and choose 'Filter messages like these'
-
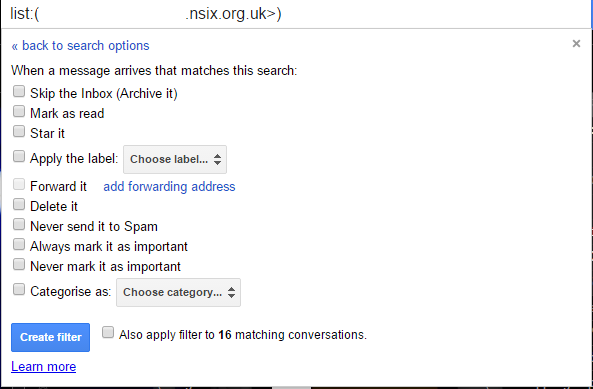
You will see a box like the one below which will have the heading at the top with your school’s e-safety group name (where 936#### is your school’s DfE code).
list:(esafety_926####@nsix.org.uk)

-
On the next screen, tick the box marked Apply the label
-
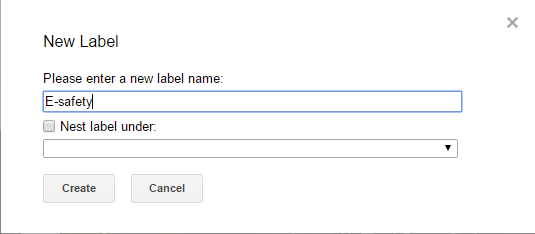
Then click on Choose Label and then click on the option for New Label
-
In the box that appears enter a name for your label then click Create
-
The previous screen will now have your label name showing.
-
Also tick the box ‘Never send it to Spam’ as we want to ensure that all e-safety emails are reviewed and none are sent to the spam folder.
-
If you would prefer the e-safety emails not to appear in your inbox then tick the ‘Skip the inbox (archive it)’ box. The emails will then be filtered to only appear under the ‘E-Safety’ label and not in your inbox.
-
Tick the box at the bottom to apply the filter to other conversations (emails) that match the criteria then click on Create Filter

-
Your new label will now be listed on the left hand side of the screen and the number of unopened emails relating to that label will be shown next to it

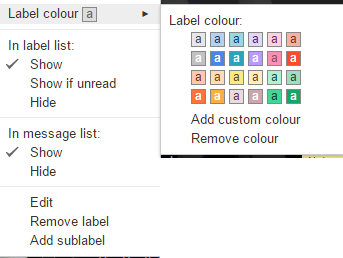
Applying a colour code to your label
-
To apply a colour code to your label, simply hover over the label name and click the 3 dots which appear
-
On the menu that appears, highlight the option for Label colour and choose a colour from the panel that appears.
-
Your e-safety emails will now be colour coded in your inbox unless you have selected 'Skip the inbox' option in which case all your e-safety emails will only appear when you click on the 'E-safety' label in the left hand menu.
