Shared Mailboxes in Office 365
If you are using a shared mailbox, such as a departmental mailbox, then the following page provides details of how to access a shared mailbox on Outlook and send emails on behalf of the shared mailbox.
Use the quick links below to skip directly to the sections you require:
1. To setup the shared mailbox in Outlook
2. To send an email on behalf of the shared mailbox
3. Adding the shared mailbox in Outlook Web Access (OWA)
4. How to Change the From Address in Outlook Web Access (OWA)
5. Always show the Bcc and From fields in Outlook on the Web (OWA)
6. How to configure the shared mailbox on a mobile device
For guidance on how to share a mailbox by granting another user access permissions, please see the following page:
Setting up additional user access to a mailbox
To setup the mailbox in Outlook
Top of page
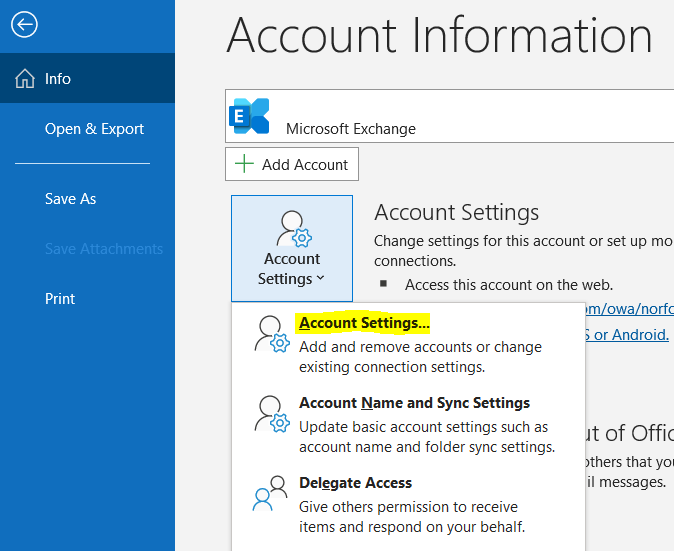
1. Open Microsoft Outlook.
2. Select File at the top left of the Outlook window. Click on the Account Settings panel and then select Account Settings again from the options:
3. You will now see the 'Account Settings' screen below:
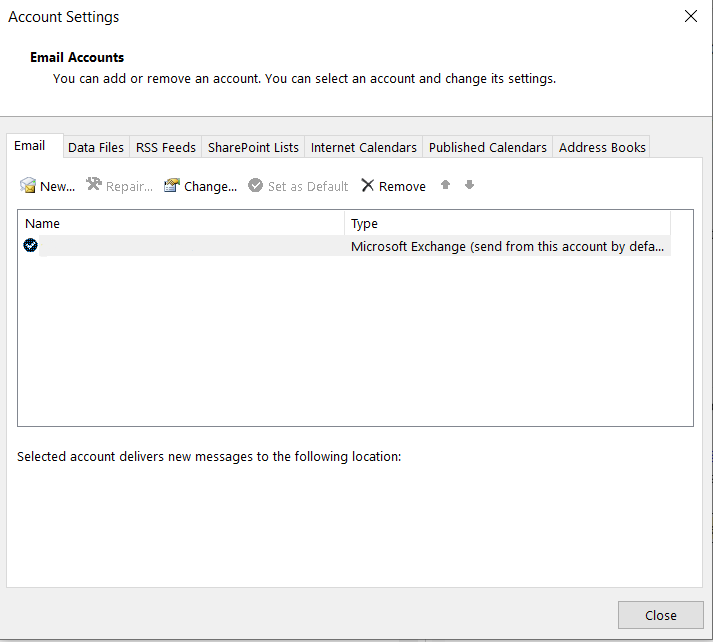
4. Double click your account which should be highlighted in grey and the following panel will appear:
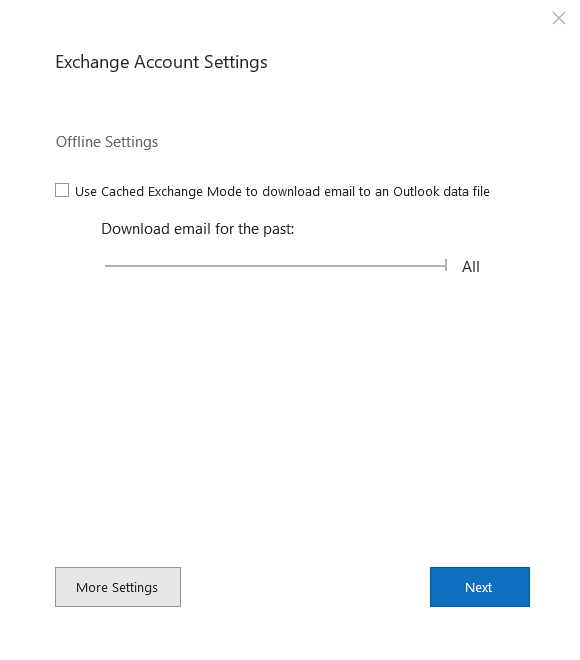
5. Select More Settings and then select the Advanced tab on the next panel. Click Add and the Add Mailbox option will appear. Type in the email address of the shared mailbox which you want to add.
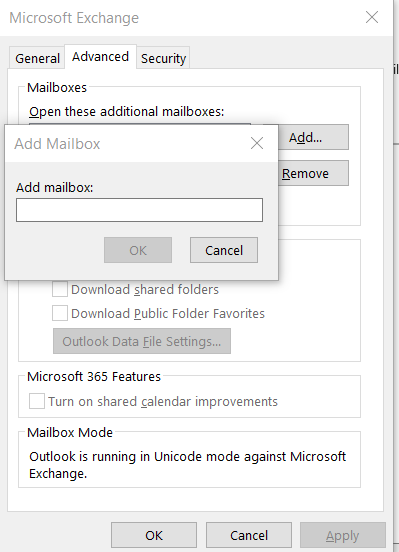
7. Click OK to all the open windows.
8. The shared mailbox should now be added to your Outlook. You should see it listed below your own mailbox folders on the left hand menu of folders.
To send an email on behalf of the shared mailbox
Top of page
To send on behalf of the shared mailbox, you must specify the shared mailbox email address in the From field. If the From field isn't displayed when you create a new email, you will need to add it:
1. Click New Email to create your email message.
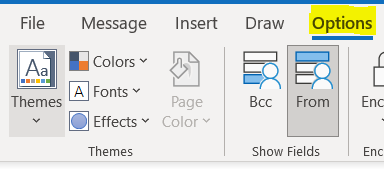
2. Click Options. In the Show Fields area, click From to select it.
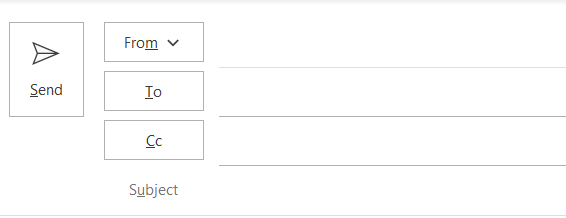
3. The From field will now appear at the top of your email message.
4. Click the drop-down arrow on the From field. The first time you send on behalf of the shared mailbox you must select the shared mailbox via the Other Email Address option. After that, the shared mailbox should appear as an option in the list.
5. Click Other E-mail Address from the drop-down list. The following dialog box appears.
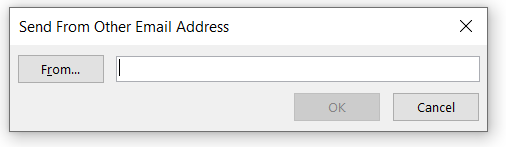
6. Enter the shared mailbox email address in the From field or use the From… button to search for the shared mailbox name.
7. Once the shared mailbox email address is displayed in the From field, click OK. The email message should now display the shared mailbox email address in the From field.
8. When the email message is ready, click Send.
Adding the shared mailbox in Outlook Web Access (OWA)
Top of page
To add the shared mailbox so it displays under your Inbox in Outlook Web Access:
1. Sign in to your account at https://outlook.office.com
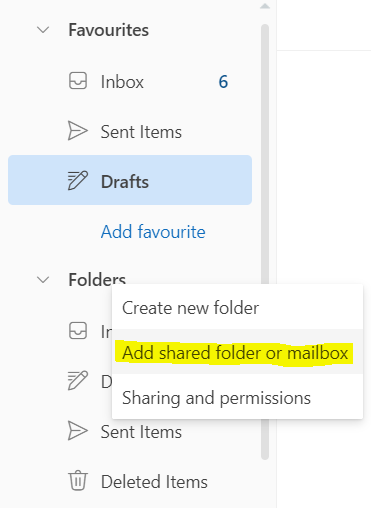
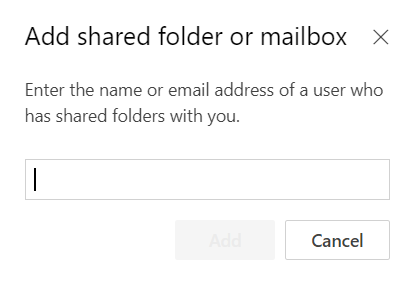
2. Right-click your primary mailbox in the left navigation pane, and then choose Add shared folder or mailbox:
3. In the Add shared folder dialog box, type the name or email address of the shared mailbox, and then click Add.
4. The mailbox should now be available in your account and should be displayed in the left hand menu.
Removing the shared folder
You can remove the shared mailbox from your folder list by right clicking on the shared mailbox and then selecting 'Remove Shared Folder'.
How to Change the From Address in Outlook Web Access (OWA)
Top of page
You need to display the From field for the message you are composing in OWA:
1. Sign in to your account at https://outlook.office.com
2. Left click New Email.
3. Click the Options tab on the top menu bar. Now tick the box next to Show From and the From field will now appear on the new email.

4. Click on the From button and select Other email address.. You should see the shared mailbox address which you have added. Select this and it will now appear in the From field.
Note: You need to have rights to send as the user in order for this to work properly, otherwise you will get an error message saying "You don't have rights to send as this user." Please contact ICT Solutions if you receive this error and believe you should have the rights to send from the shared mailbox.
Always show the Bcc and From fields in Outlook on the Web (OWA)
Top of page
When you are using Outlook in your browser as part of the Office 365 account, the From field and Bcc field will not be shown by default when composing a message. You can make them visible by default in the following way:
1. Sign in to your account at https://outlook.office.com
2. Open the Settings panel by clicking on the Gear icon in the top right corner and selecting View all Outlook settings.
3. On the Settings panel select Email from the left hand menu and then Compose and reply from the second menu list.
4. Scroll down the settings to Message format and tick Always show Bcc and Always show From to ensure that these two fields are displayed by default on new emails.
6. Click the Save button which appears in the bottom right of the Settings panel to save these changes.
Top of page
To access your Office 365 mailbox on a mobile device, the Microsoft Outlook mobile app is recommended:
https://apps.apple.com/app/id951937596 for Apple IOS devices.
https://play.google.com/store/apps/details?id=com.microsoft.office.outlook for Google Android devices.
The following QR codes may assist in downloading the application from the relevant app stores. Alternatively, just search for “Microsoft Outlook” from within your device's application store.
 Apple IOS Store (iPhones)
 Google Play Store (Android)
With your main account already setup on the Outlook mobile app, follow the steps on the link below to add an additional shared mailbox:
Add a shared mailbox to Outlook mobile